

-
74
-
2025-09-11 13:36:09

Car maintenance is very important. Routine maintenance items usually include engine oil, oil filter, cabin air filter, and engine air filter replacements. However, for very meticulous maintenance, the list goes beyond these. For example, replacing engine oil, oil filter, air filter, cabin air filter, fuel filter, transmission fluid, engine serpentine belt, checking spark plugs, tires and brake system, cleaning the throttle body and fuel injectors, adding brake fluid, etc. It's very difficult for us car owners to be extremely thorough. The more careful and detailed you are in maintaining your car, the longer its lifespan will be. Why do some cars of the same age last longer in terms of years and mileage? It's related to good maintenance. Therefore, maintaining your car well should not be neglected!
Today, I'm sharing how to clean the oxygen sensor. Perhaps many car owners don't pay attention to this. A car has two oxygen sensors: the upstream (pre-catalytic converter) oxygen sensor and the downstream (post-catalytic converter) oxygen sensor. What do these oxygen sensors do?
The upstream oxygen sensor's function is to detect the oxygen concentration in the engine's exhaust gases and provide this information as an electrical signal to the ECU (Engine Control Unit). The ECU then uses this oxygen concentration information for closed-loop control of the fuel injection quantity. The downstream oxygen sensor primarily detects the oxygen concentration in the exhaust gases after they have been treated by the three-way catalytic converter. Today, I'm mainly sharing how to clean the upstream oxygen sensor. Importantly, it's a DIY cleaning, meaning you can get it done without spending any money.
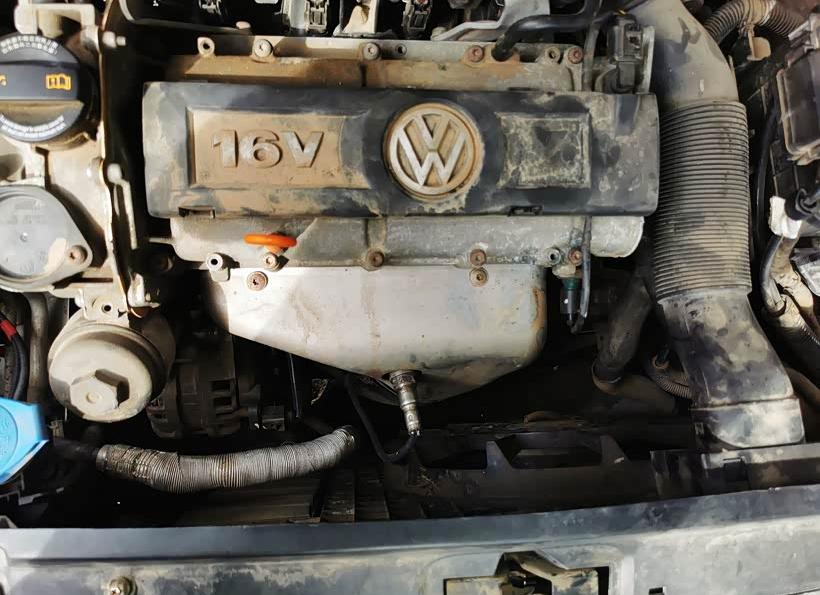
∆ Open the hood.
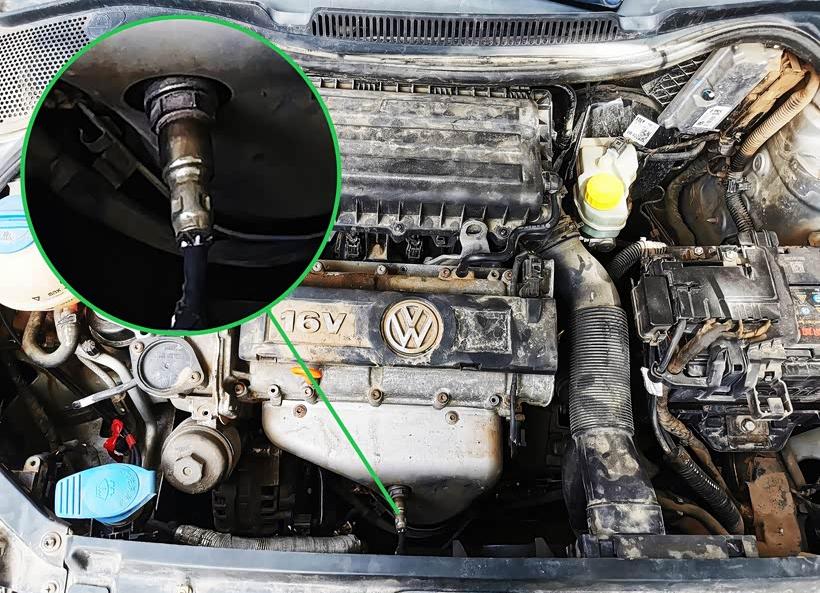
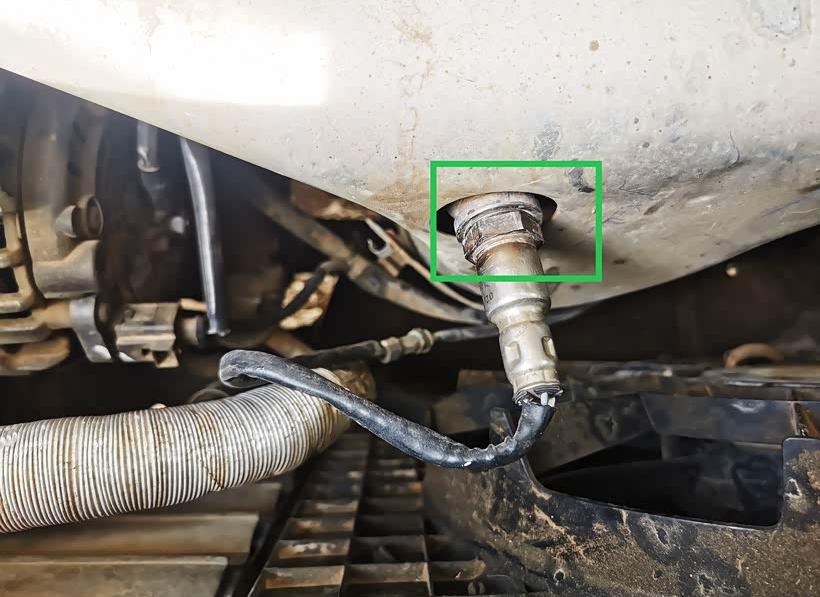
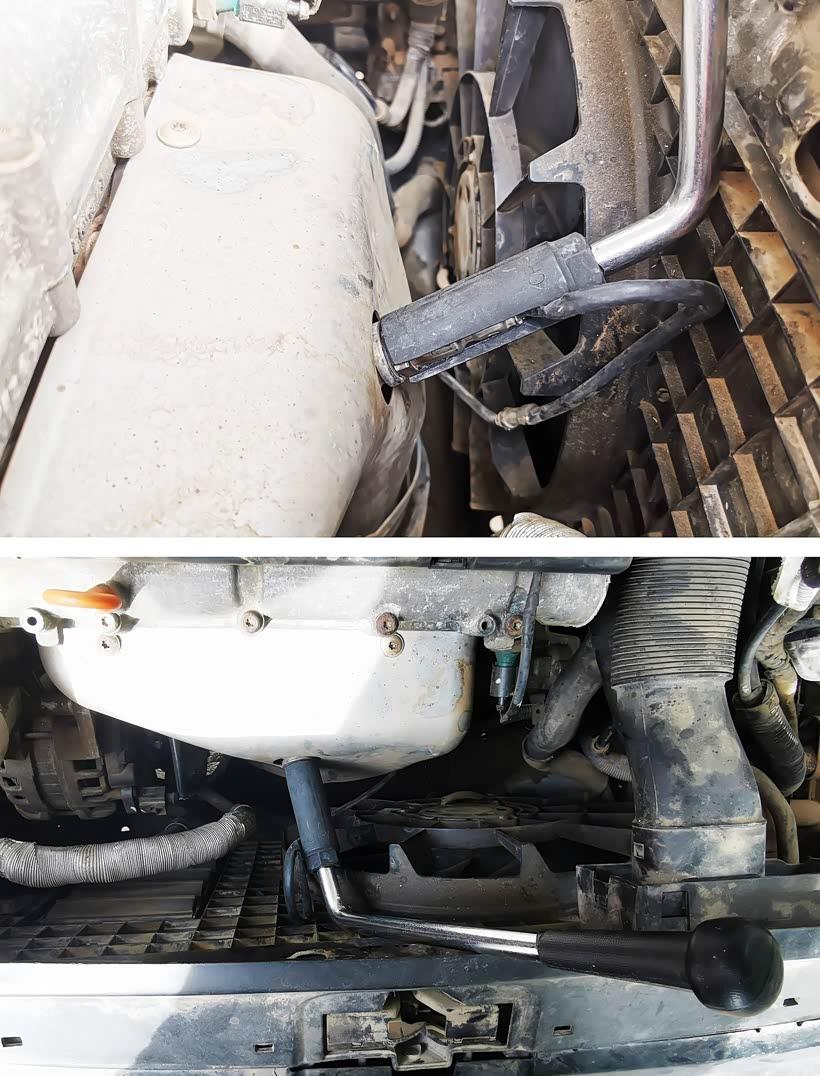
I'll use my Polo as an example. The upstream oxygen sensor in the Polo is located between the engine and the radiator. Its location is quite obvious, easy to observe, and also relatively easy to access.
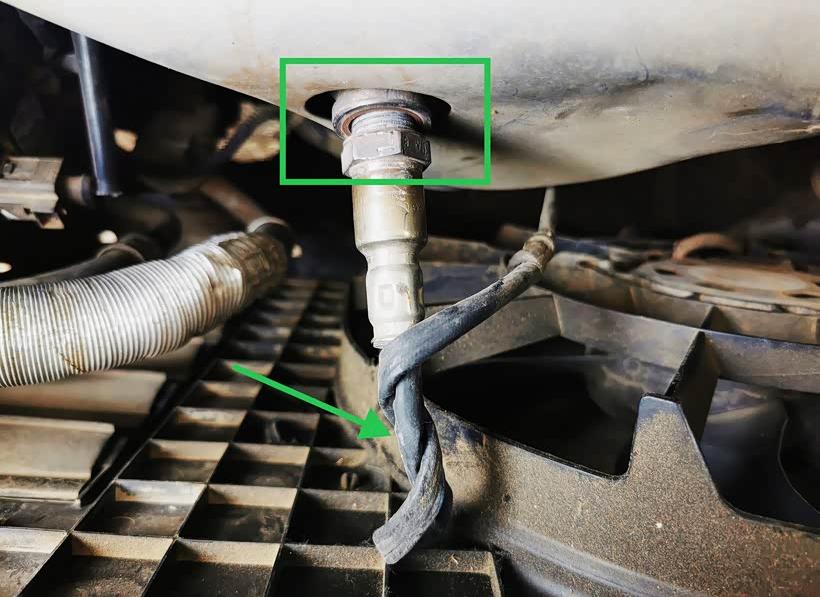
∆ This is the upstream oxygen sensor.
It's the spot marked in the picture. If you want to clean it yourself, look for it at the location marked in the image.
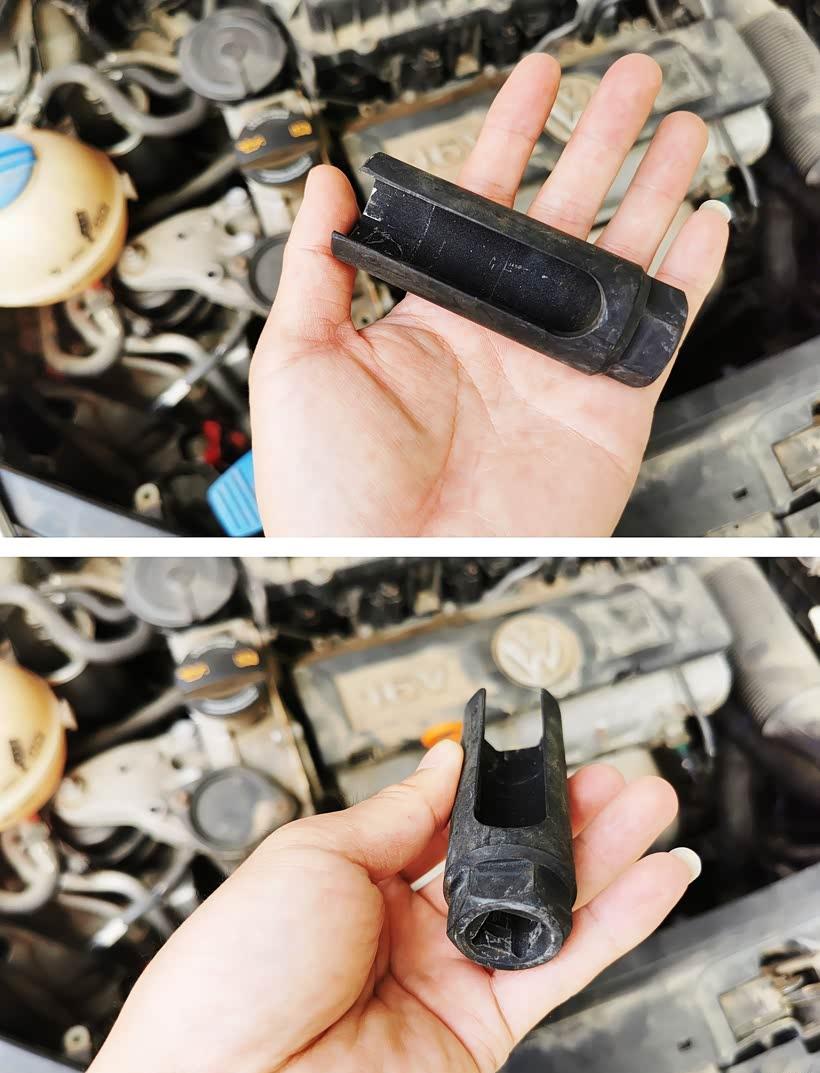
∆ Prepare the removal tool.
The removal tool is a special oxygen sensor socket, which can be purchased online. Alternatively, a large socket wrench can also be used for removal.
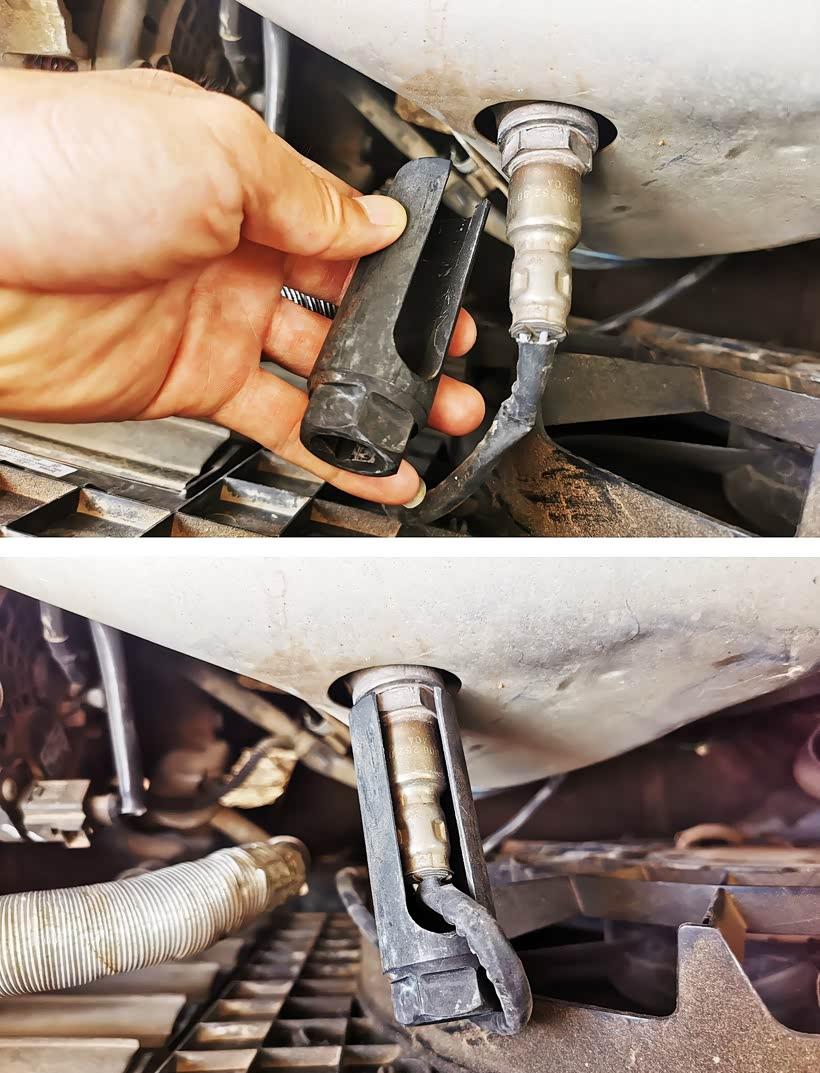
∆ Method for using the special tool:
This special tool has a gap to make room for the wire harness, providing a pre-cut slot for it.
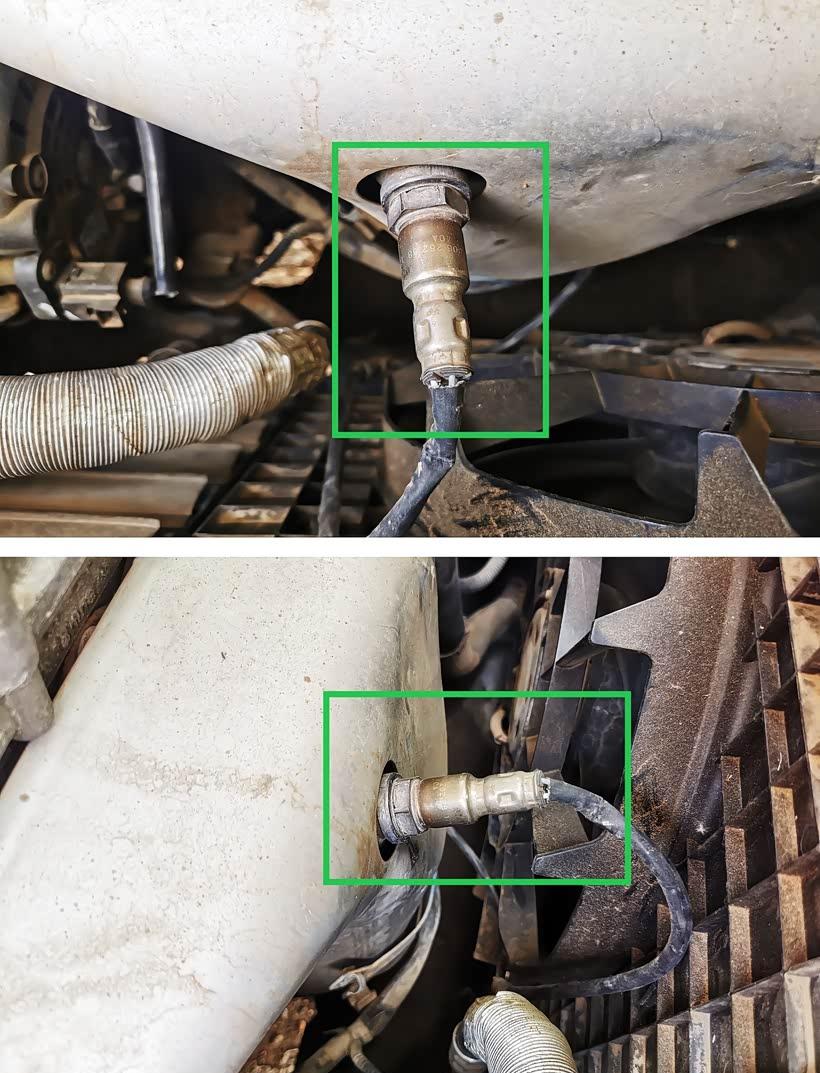
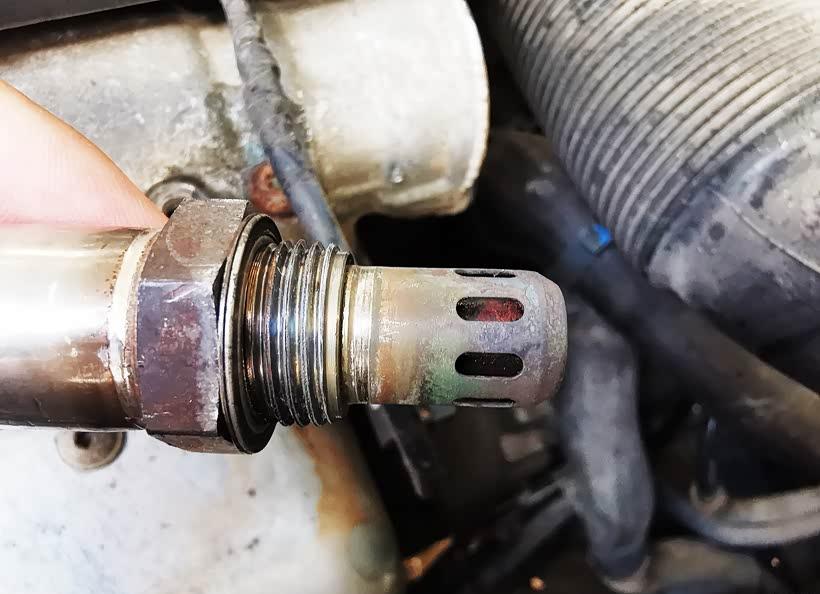
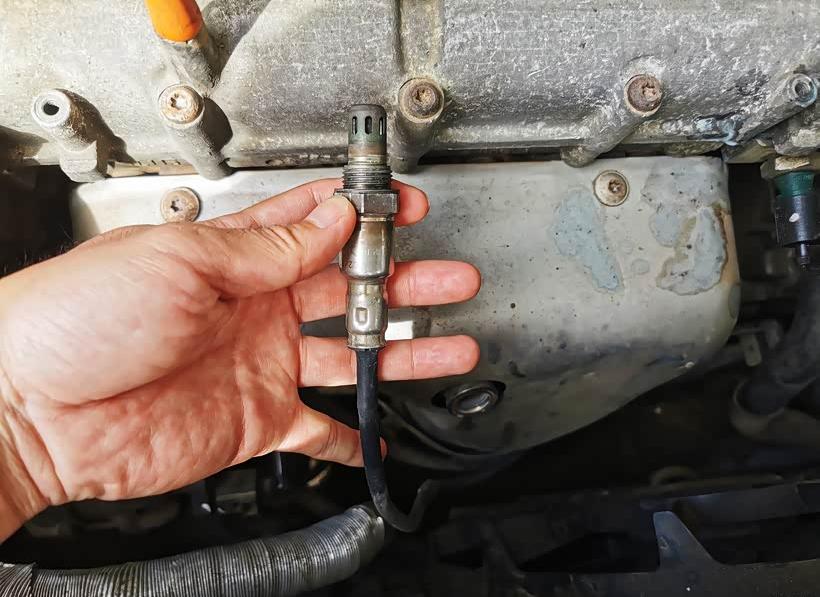
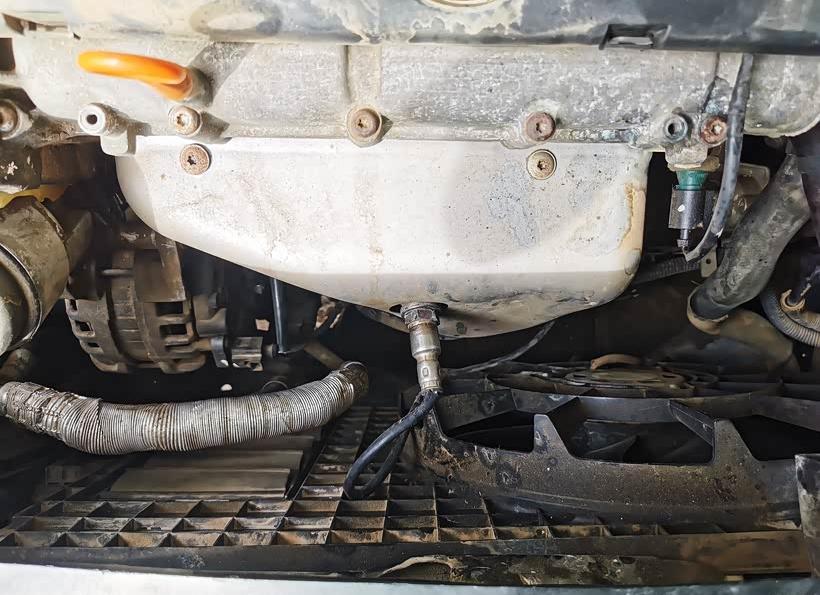
∆ The oxygen sensor is removed.
Let me mention here: the other end of the oxygen sensor has an electrical connector (the power supply connector), located at the bottom of the engine. You can unplug the connector first before removing the oxygen sensor. Of course, you can also remove the sensor without unplugging the connector. Not unplugging it just means the wire harness will be attached, so pay attention to managing the harness during installation to avoid twisting. Otherwise, after installation, the wire harness might be tangled. The connector was a bit hard to reach and awkward to operate on mine, so I chose to remove the oxygen sensor without unplugging the connector.
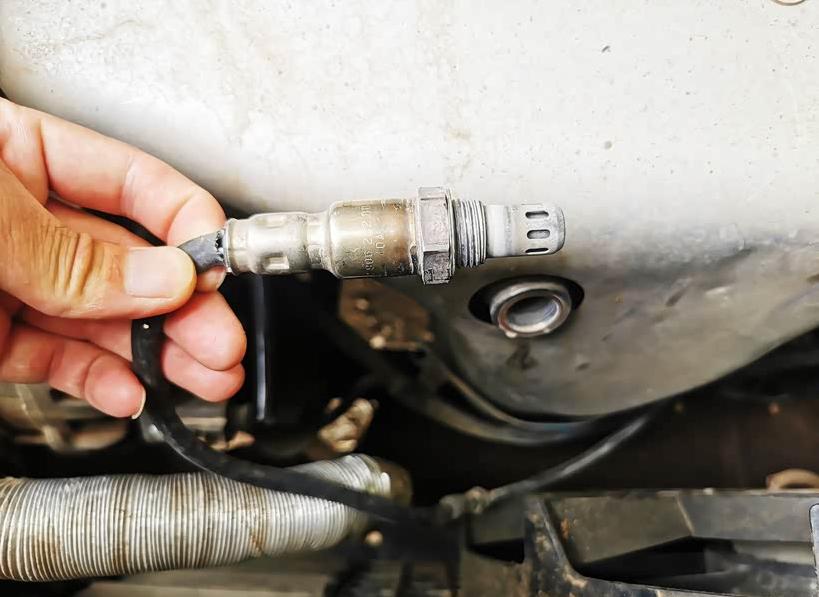
∆ The oxygen sensor is removed.
A breaker bar can be used with gentle force to remove the oxygen sensor. My car was fine; it wasn't rusty because I usually remove and clean the oxygen sensor once a year.
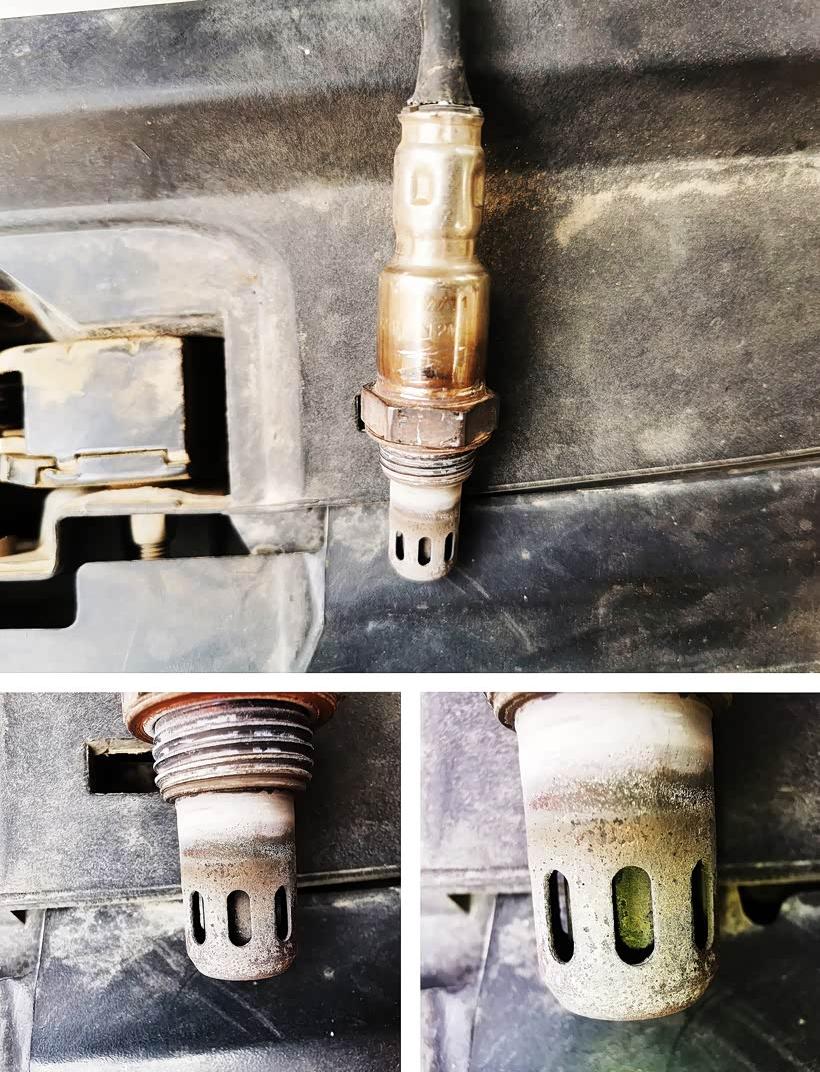
∆ Look at the carbon buildup on the oxygen sensor.
Carbon buildup on the oxygen sensor is caused by incomplete engine combustion or possibly by using low-quality gasoline. So, what we can do is regularly check and clean it, or even replace the oxygen sensor.

∆ Cleaning formula.
The cleaning agent of choice is toilet bowl cleaner (Note: Use with caution, specific chemicals designed for oxygen sensor cleaning are recommended), or carburetor cleaner could also work.
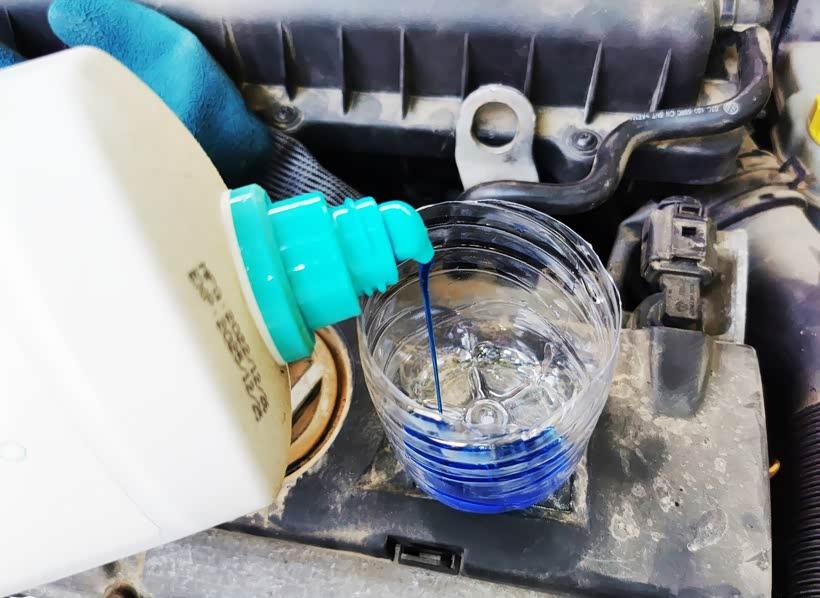
∆ Made a disposable cup from a plastic water bottle.
Pour in the toilet bowl cleaner, enough to immerse the tip of the oxygen sensor.

∆ Immerse the oxygen sensor.
The immersion time should be about half an hour.
∆ Carbon cleaning.
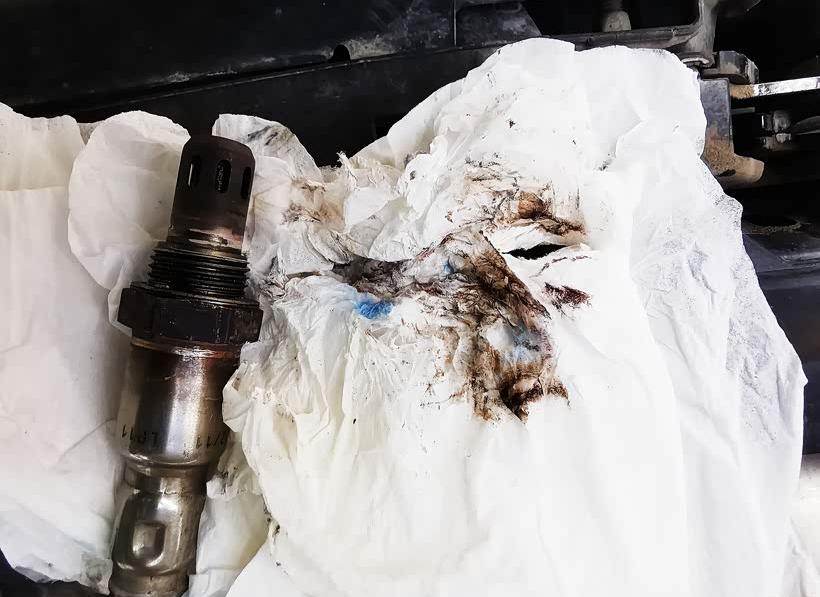
After soaking for half an hour, take it out and wipe it with a paper towel. You'll see that the black carbon deposits can already be cleaned off.
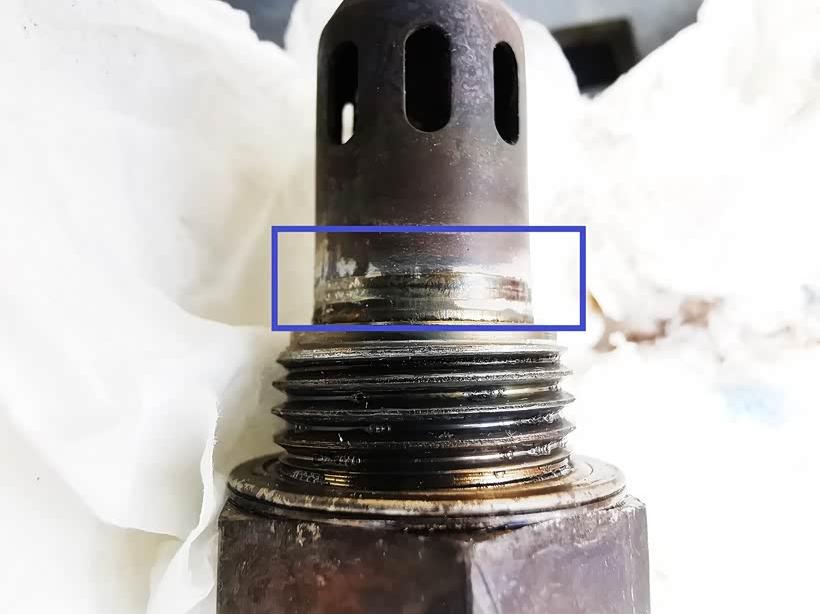
∆ Seeing the shiny part emerge.
Already more than half of the carbon buildup is cleaned off, but some carbon deposits still remain attached.
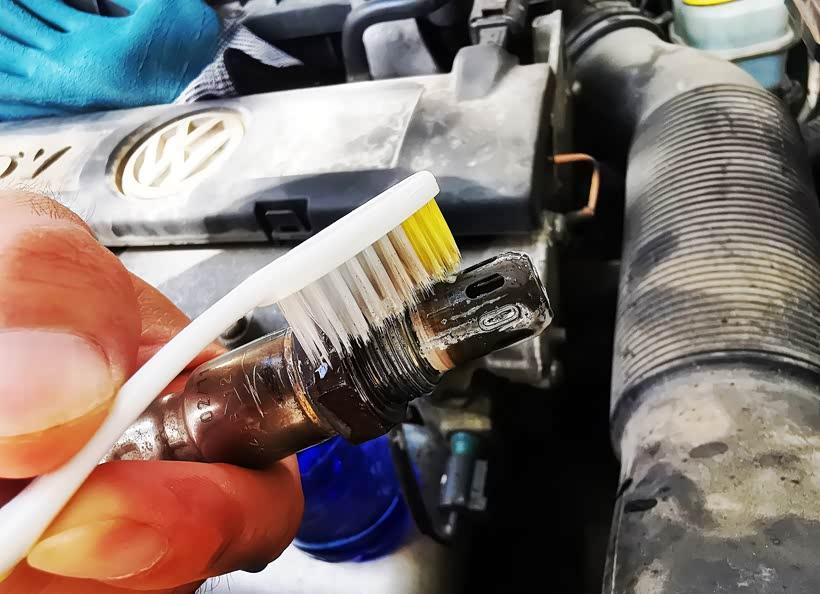
∆ Cleaning with a toothbrush.
You can soak it again for a while, or use an old toothbrush to scrub off some of the remaining carbon deposits.
∆ Most of the carbon buildup is cleaned off.
The cleaning result like this is very obvious; most of the carbon deposits can be removed. Installing it back will definitely have an effect.
∆ Cleaning completed.
Look, this cleaning result is pretty good. No need to replace it with a new oxygen sensor; it can continue to be used.
∆ Install the oxygen sensor by rotating it counterclockwise a few times.
This method of twisting the harness while installing the oxygen sensor is because we didn't disconnect the plug, so the harness will be twisted. Just rotate it counterclockwise a few times during installation, as described, so that after the installation is complete, the wire harness won't be twisted.
∆ Tighten the installation.
After installing it like this, the wire harness should be free of twists.
∆ Tighten the oxygen sensor with the breaker bar.
You can apply force, but it doesn't need to be overly tight. Just tighten it firmly by feel.
∆ Oxygen sensor installation completed.
Now the oxygen sensor is installed.
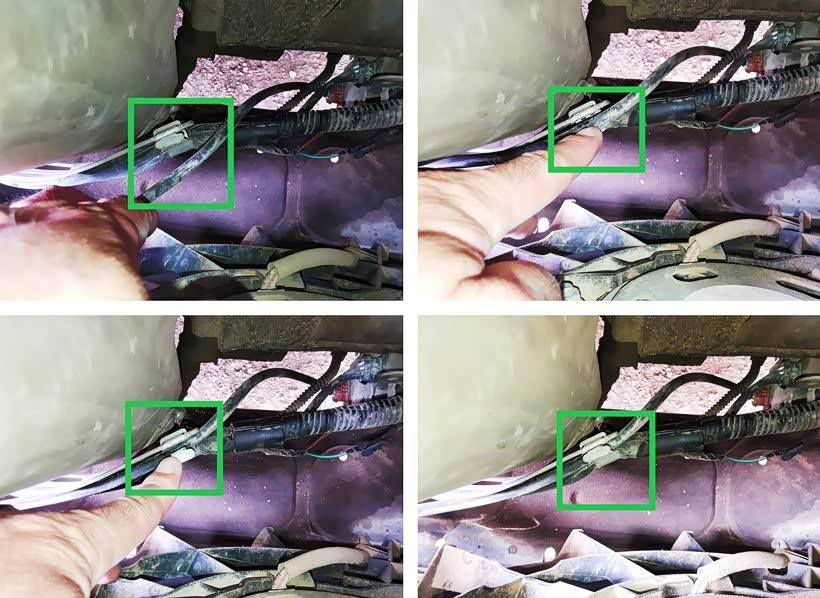
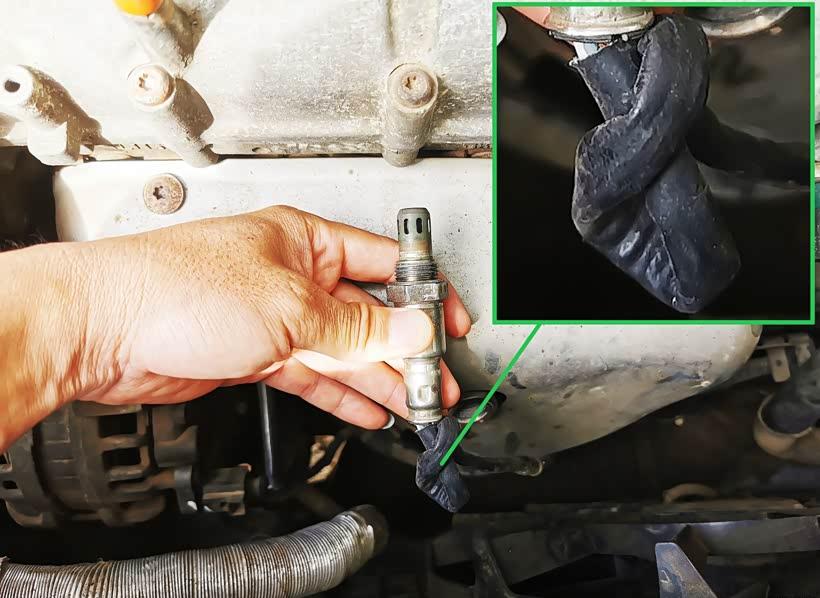
∆ There are also two wire harness securing points; this is one of them.
The harness is secured with fixed clips. Just clip the harness into the pre-designed locations on the car.
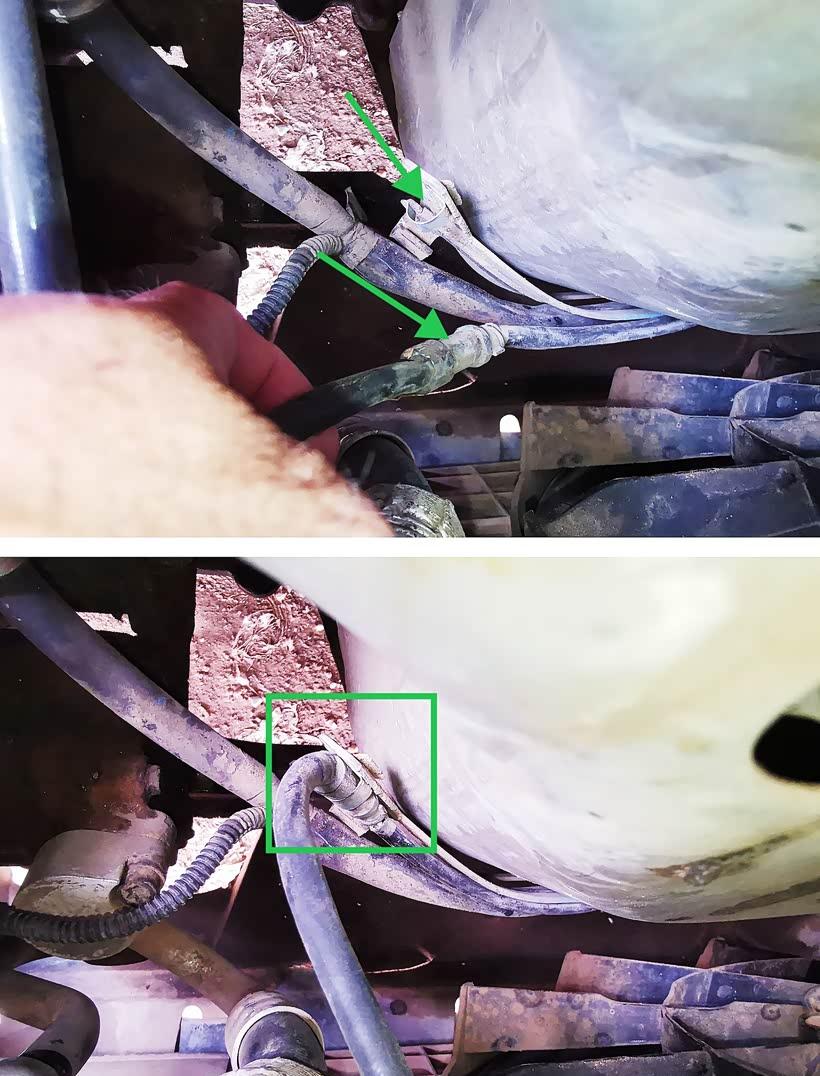
∆ Securing the harness at the other location.
Securing the harness is to prevent it from swinging back and forth during driving, which over time could damage the harness or wear through the insulation.
∆ Oxygen sensor installation fully completed.
From removal -> cleaning -> installation, three steps complete the oxygen sensor cleaning.

Cleaning the oxygen sensor will have a certain effect, especially if there is a lot of carbon buildup; the effect will be more obvious.
The oxygen sensor is one of our car maintenance items. Although it doesn't need replacing as frequently as engine oil, I still recommend checking it regularly. For example, once a year or every six months, remove the oxygen sensor and check it. If there's carbon buildup, clean it; if not, put it back. It's very hassle-free. This kind of maintenance habit will definitely help extend your car's lifespan.


