

-
106
-
2025-11-04 17:18:07
If your power tools are suddenly acting up—maybe your drill won't spin up like it used to, or your angle grinder is throwing more sparks than a 4th of July fireworks show—chances are, you’ve got a brush problem. Again.
I’ll be straight with you: I used to blow through carbon brushes way too often. My old angle grinder went through them like I go through coffee on a Monday morning. And you know what? It wasn’t the brushes’ fault. I was missing the bigger picture.
So if you’re tired of replacing motor brushes every few months, you’re in the right place. Let’s cut through the noise and look at the 7 real reasons your brushes keep wearing out—and better yet, how to actually fix ’em.
⚙️ First: What the Heck Is a Carbon Brush, Anyway?
In simple terms, a carbon brush is the middleman between your motor’s stationary wiring and the spinning commutator. It’s the part that delivers power where it needs to go—under pressure, with sparks flying, and while getting hotter than a Florida parking lot in August.
When that middleman wears down way too fast, it’s usually a sign something else is wrong. And no, just slapping in another brush won’t solve it.
The 7 Usual Suspects of Rapid Brush Wear
1. Weak Spring Pressure – The "Silent Killer"
What’s Happening:
Every brush is pushed against the commutator by a spring. Over time, that spring gets tired—especially the clock-spring or finger-spring types. When the pressure drops:
● The brush starts arcing (sparking) because it’s not making solid contact.
● Arcing burns away the carbon material way faster than normal wear.
● Even a 10-15% drop in pressure can double or triple wear rates.
How to Check & Fix:
●Finger Test: Power off, press the brush. It should feel firm and springy. If it’s soft or loose, the spring is shot.
●Use a Gauge: For serious jobs, grab a brush spring pressure gauge (under $50 online). Match it to your motor’s specs (usually 15–25 N/cm²).
My Advice: Replace weak springs with OEM parts. Stretching a spring is a band-aid fix—don’t rely on it.
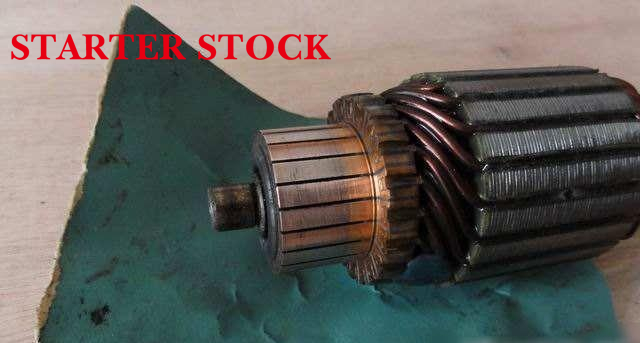
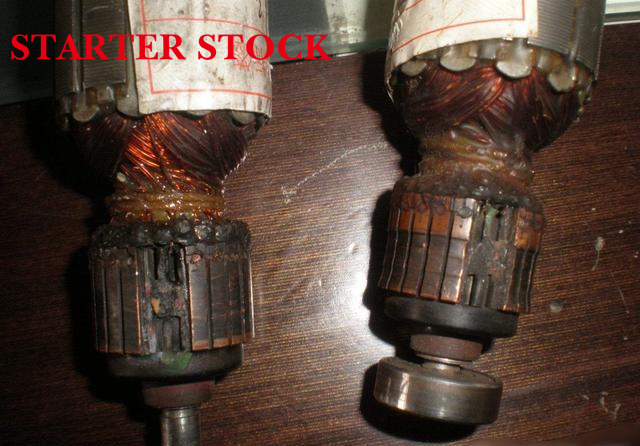
2. Rough or Dirty Commutator – The "Double Wear" Problem
What’s Happening:
The commutator is that shiny copper surface the brush rides on. If it’s scored, grooved, or covered in gunk:
● It acts like sandpaper on the brush.
● An out-of-round commutator makes the brush bounce, causing arcing and uneven wear.
● Grooves trap carbon dust and make things worse.
How to Check & Fix:
●Visual Check: Look for scoring, dark spots, or roughness. It should be smooth and shiny.
●Check for Wobble: Spin the armature by hand. If it wobbles, you’ve got problems.
Fix:
●Light marks: Polish with 400-grit sandpaper (wrap it around something flat).
●Deep grooves or wobble: The commutator needs to be turned on a lathe—or replaced if it’s a small motor.
3. Misaligned Brush Holders – The "Uneven Wear" Issue
What’s Happening:
If the brush holders aren’t aligned right:
●The brush wears at an angle—one edge disappears faster than the other.
●In DC motors, being off the "neutral plane" by even a degree increases arcing.
How to Check & Fix:
●Look for alignment marks on the housing. No marks? Measure from each holder to the center—should be equal.
●Loosen the holder screws and adjust until it’s centered. For DC motors, shift the holder slowly while running (at low speed) until arcing stops.
4. Wrong Brush Grade – The "Mismatch" Mistake
What’s Happening:
Not all brushes are the same. Using the wrong type is like putting the wrong oil in your engine:
●Soft brushes in high-power tools? They’ll burn up.
●Hard brushes in slow-speed motors? They’ll grind everything down.
●Cheap aftermarket brushes? They’re often full of fillers and wear out 3x faster.
How to Fix:
●Find the grade code on the old brush (e.g., "EG-3", "MG-50").
●Match it:
○ Low-amp motors (fans, small appliances): Pure graphite.
○ Medium-amp (power tools): Electrographite.
○ High-amp (industrial motors): Metal-graphite (copper content).
Stick with quality brands—Helwig, Morgan, or OEM.
5. Motor Overloading – The "Heat Killer"
What’s Happening:
Pushing a motor too hard:
●Spikes the current, overheating the brushes and commutator.
●For every 10°C (18°F) over normal, wear increases 15-20%.
●Extra load means extra friction.
How to Check & Fix:
●Signs: Motor gets hot (>140°F), hums loudly, bogs down under load.
●Fix:
○ Don’t overwork it. Let the motor do what it’s rated for.
○ Check for jams or blockages (e.g., dusty vents, stuck bearings).
○ If you constantly need more power, upgrade the motor.
6. Dirty or Humid Environment – The "Contamination" Factor
What’s Happening:
Dust, oil, or moisture gets into the motor:
●Dust and grit act like abrasives.
●Oil causes slipping and arcing.
●Humidity increases resistance and heat.
How to Check & Fix:
●Open it up. Look for dust, grease, or rust.
●Clean it: Blow out dust with compressed air. Degrease with isopropyl alcohol.
●Prevent it: Use filters for dusty shops; seal motors outdoors.
7. Worn-Out Motor Parts – The "Domino Effect"
What’s Happening:
Other worn parts kill your new brushes:
●Bad bearings? The commutator wobbles.
●Damaged windings? Current fluctuates, causing arcing.
●Loose wiring? Intermittent contact fries brushes.
How to Check & Fix:
●Check Bearings: Spin the shaft. Grinding or looseness = replace bearings.
●Check Windings: Use a multimeter. Zero resistance = short circuit.
●Fix:
○ Bearings are cheap and easy to replace.
○ Rewinding small motors often isn’t worth it—replace the motor.
○ Tighten all connections.
Quick Diagnostic Flow
When brushes wear fast, follow this:
1. Inspect the brush – Wrong grade? Uneven wear?
2. Test the spring – Still got tension?
3. Check the commutator – Smooth? Round? Shiny?
4. Consider the load – Does the motor overheat?
5. Look around – Dusty? Oily? Wet?
Pro Tips for Longer Brush Life
●Replace in pairs – Always.
●Break in new brushes – Run the motor at low speed for 10-15 minutes.
●Regular maintenance – Clean and check every 3-6 months.
●Keep a log – Note replacement dates and wear patterns.
When to Just Replace the Motor
If you’ve tried everything and brushes still wear quickly, it might be time to retire the motor—especially if it’s:
●5-10 years old (household tools)
●10-15 years old (industrial equipment)
Wrap-Up
I learned this the hard way: throwing new brushes at an old problem is a waste of time and money. Check the springs, the commutator, the load—get to the root cause.
Hope this helps someone out there. If you’ve got your own tips or tricks, drop them in the comments below. Let’s keep the conversation going.
This post is based on hands-on experience and technical insights from Helwig Carbon.


