

-
80
-
2025-11-11 17:12:26
Let me tell you about a mistake I made early in my career that cost a customer big time. I was working on a industrial floor polisher that kept losing power. The brushes looked "okay enough" to my inexperienced eyes, so I cleaned the commutator and sent it back out. Two days later, the motor seized completely—worn brushes had allowed arcing that destroyed the commutator. That $30 brush replacement turned into a $400 motor rebuild.
After 15 years in the motor repair business, I've learned to spot brush problems before they become motor killers. Here's exactly what to look for—no technical degree required.
First: Understanding the "Why" Behind Brush Wear
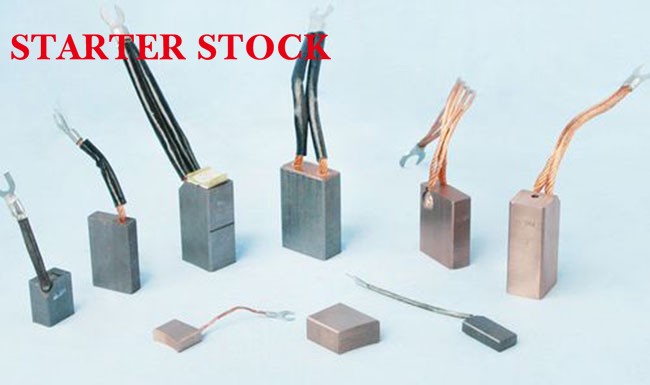
Carbon brushes are what I call "controlled sacrifice." They're designed to wear down gradually, protecting your expensive commutator and windings. Think of them like brake pads for your motor—they take the hit so more valuable parts don't have to.
Normal wear looks like:
● Smooth, curved surface where it meets the commutator
● Even chocolate-brown color
● Gradual power decrease over 6-12 months of regular use
Danger signs include:
● One edge worn faster than the other (like a slanted haircut)
● Black, glazed surface that looks "burnt"
● Chunks missing or deep grooves
7 Dead Giveaways Your Brushes Need Immediate Attention

1. The "Fourth of July" Spark Show
What you'll see: Normally, you might see faint orange sparks at startup. Problem sparks are bright blue/white, continue during operation, and appear at multiple points around the commutator.
Real-world example: Last month, a contractor brought in a concrete saw that was "lighting up like a sparkler." The brushes were so short the springs were digging into the commutator. New brushes eliminated 90% of the sparks immediately.
Pro tip: Check sparking in dim light and listen for sizzling or cracking sounds that accompany serious arcing.
2. The Motor That Can't Handle the Pressure
What you'll notice: Your drill bogs down with pressure that never used to bother it, or your vacuum cleaner slows noticeably when moving from hardwood to carpet.
Why this happens: Shorter brushes mean higher electrical resistance. It's like trying to drink a thick milkshake through a thin straw—you have to work harder for the same result.
Quick diagnostic: If the motor runs fine unloaded but struggles with normal work, think brushes first.
3. Sounds That Signal Trouble
● Clicking/popping rhythm: Usually means the brush is bouncing instead of maintaining smooth contact
● High-pitched squeal: Often indicates glaze buildup on brushes or commutator
● Metallic grinding: The worst sound—means brush is gone and holder is eating the commutator
Story time: A restaurant owner complained about their exhaust fan making "funny noises." The brushes were down to 3mm, and the weakened springs were letting them chatter against the commutator. The sound was the first warning before complete failure.
4. Visual Clues Even Your Grandma Could Spot
Length check: Most manufacturers stamp a wear line on brushes. If it's gone, replace immediately. No line? Anything under 1/4 inch (6mm) is dangerous territory.
Surface tells:
● Cracking across the face: Like dried mud—means brittle brushes
● Copper dust embedded: Shows excessive commutator wear
● Angled wear pattern: One side shorter than the other indicates alignment issues
5. Your Nose Knows—The Burn Test
Electrical burning has a distinct smell—sharp and metallic, different from burning dust or oil. If you smell it coming from the motor vents, shut down immediately.
Recent case: A woodworker mentioned his table saw "smelled hot" after 10 minutes of use. The brushes were overheating due to poor contact, preheating what could have been a winding failure.
6. The "Temperamental Teenager" Phase
Motors that work intermittently or respond to "persuasion" (like tapping the housing) are often suffering from brush issues. This happens because worn brushes make inconsistent contact as the commutator rotates.
Simple test: Try running the motor while gently twisting the power cord near the housing. If operation changes, you've likely got brush contact issues.
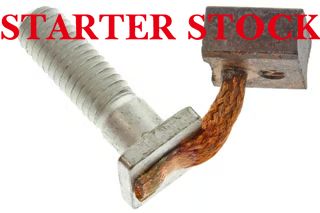
7. The Commutator Doesn't Lie
Even if brushes look questionable, the commutator tells the real story:
Healthy commutator: Smooth, uniform copper color, minimal groove between segments
Problem signs:
● Black patches: Carbon tracking from arcing
● Deep grooves: Insulation wearing faster than copper
● Ridges: Uneven wear that will destroy new brushes
The 5-Minute Motor Brush Health Check
Tools needed: Flashlight, ruler or caliper, small mirror (for hard-to-see spots)
1. Safety first: Unplug or disconnect power completely
2. Access brushes: Remove inspection caps or brush holders (usually just a screw or two)
3. Document findings: Note length, surface condition, spring tension
4. Compare sides: Both brushes should wear at similar rates
5. Check commutator: Use mirror to inspect surface through openings
Measurement hack: A standard pencil is about 7mm thick. If your brushes are thinner than the pencil's diameter, replace them.
Brush Condition Cheat Sheet for Quick Reference
Condition | Good | Concerning | Replace Now! |
Length | >10mm | 6-10mm | <6mm |
Surface | Smooth curve | Slight chipping | Cracks/breaking |
Color | Uniform brown | Spotted black | Glossy black |
Spring | Firm pressure | Slight weakness | No pressure |
Commutator | Pale gold | Dark patches | Scored/grooved |
When Replacement Isn't Enough: The Underlying Issues
If you replace brushes and notice these patterns, dig deeper:
Brushes wear unevenly:
● Check brush holder alignment
● Verify spring tensions match
● Look for commutator runout
New brushes wear out in <3 months:
● Possible overloading
● Contamination (dust, oil)
● Wrong brush grade for application
Excessive sparking continues after replacement:
● Commutator likely needs resurfacing
● Possible winding issues
● Check for short circuits
Pro Maintenance Tips That Add Months to Brush Life
1. The proper break-in: For new brushes, run motor at 30-50% load for 30 minutes, then cool completely. This seats brushes properly.
2. Clean breathing matters: Use compressed air to blow out carbon dust every 50 hours of operation.
3. Storage savvy: In humid climates, run motors briefly every month to prevent moisture buildup.
4. Buy smart: Always replace in matched pairs and use identical grades—mixing breeds problems.
When to Hand It Over to a Professional
Call your local motor shop if you see:
● Copper bars on commutator showing excessive wear
● Brushes that wear drastically different lengths repeatedly
● Evidence of melting or severe overheating
● Any uncertainty about motor specifications
As the old saying goes: "Pay me now in brushes, or pay me later in windings." Regular brush maintenance is the cheapest insurance your motor can have.
Need help identifying your brush type? Check our visual guide at [YourSite.com/brush-identification] or consult technical resources at HelwigCarbon.com.
Remember: The few minutes you spend checking brushes today could save you from a motor replacement tomorrow. What brush problems have you encountered in your shop? Share your stories in the comments below.


