

-
92
-
2025-11-25 14:51:29
Let me tell you a story about my apprentice Tommy. Kid shows up Monday morning looking like he lost his best friend. "Boss," he says, "the Milwaukee angle grinder's toast. Started shooting sparks like a welding machine and quit on me." I took one look at the smoke still coming out of the vents and just laughed. "Relax, kid. You just met your first set of dead carbon brushes."
That was five years ago. Last month, Tommy called me from his own shop now, walked some homeowner through replacing brushes in a DeWalt drill over the phone. Felt like a proud father.
The Signs Your Brushes Are Screwed
Most people miss the warning signs until it's too late. I had a customer last month ready to scrap a $800 Makita concrete saw because it "lost its guts." Turns out the brushes were so worn the springs were grinding on the commutator.
Here's what to watch for:
The power fade doesn't happen overnight. It's gradual. Your drill takes longer to get through studs, your grinder bogs down on cuts it used to handle easily. My neighbor's table saw needed an extra second for every cut through plywood - classic brush wear.
The spark show is what finally gets people's attention. Some sparking at startup is normal, but when you see consistent blue-white sparks dancing around the motor housing, that's your final warning. I remember this contractor's rotary hammer that lit up like a Christmas tree - we caught it just before it took out the armature.
The sounds tell you everything. New grinding means the brush is breaking up. Clicking that matches the motor speed means the spring's bouncing. That high-pitched whine? Usually a combination of brush wear and commutator issues.

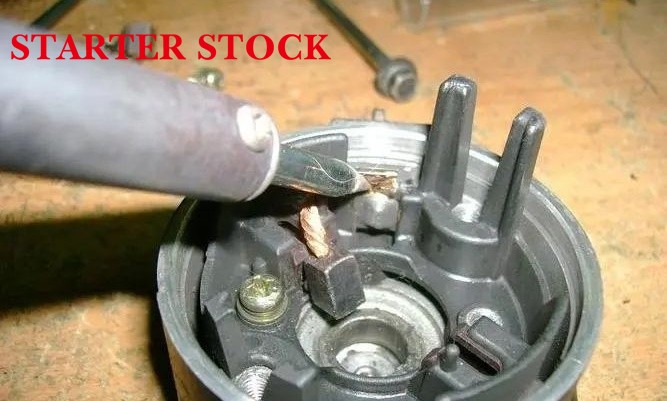
Picking the Right Brushes - This Ain't Rocket Science
I learned this lesson in the dumbest way possible. Tried to save three bucks on some generic brushes for my favorite Snap-on impact gun. Two weeks later, I'm cleaning black dust out of the motor and buying the expensive ones anyway.
Material matters more than you think:
Electro-graphite brushes are your workhorses - perfect for 90% of power tools
Metal-graphite brushes are for your heavy equipment - starters, winches, industrial tools
Pure graphite is for light duty stuff - fans, small appliances
Size isn't something you eyeball. I keep a $20 digital caliper in my box just for measuring brushes. Got tired of wasting time with returns when "close enough" wasn't good enough.
Brands do matter. I've had good luck with Helwig and Morgan brushes. The cheap no-name stuff often contains fillers that wear out fast and trash your commutator.
The Replacement - How I Do It In My Shop
Safety first - unplug the damn tool. I've seen more close calls than I can count from people thinking "I'll just be quick."
Finding the brushes is usually straightforward. Most tools have access caps on the housing. For the tricky ones, I just search "[tool model] brush replacement" on my phone - there's always some Russian guy on YouTube who's made a video about it.
When you get the old brushes out, don't just throw them away. Lay them side by side and look at the wear patterns. If one's more worn than the other, you might have deeper issues. I had a customer's planer where one brush wore twice as fast - turned out to be a weak spring.
Cleaning is where most people screw up. Before installing new brushes:
Blow out all the carbon dust with compressed air
Look at the commutator - it should be smooth and evenly colored
If it's black or rough, gently clean it with a Q-tip and alcohol
I helped a young mechanic last week whose drill commutator looked like it survived a house fire. We cleaned it up, installed new brushes, and saved him from buying a new tool.
Installation is straightforward. Make sure the new brushes move freely in their holders. The spring tension should be firm but not excessive. And for God's sake - replace both brushes every time. I don't care if the other one "looks fine."
The break-in period matters. Run the tool with no load for 10-15 minutes after replacement. This seats the brushes properly against the commutator. The first time I skipped this step, my new brushes wore out in a month.
Real World Stories From the Trenches
The most satisfying repair I ever did was on a 1970s DeWalt radial arm saw. Guy brought it in saying it was his father's. The brushes were original and completely shot. Put in new ones and that old beast fired right up - good for another fifty years.
Then there was the landscaping company ready to replace six commercial blowers. Each needed $18 in brushes instead of $400 replacements. The owner bought me lunch for a month.
Just last week, a construction foreman was about to scrap a $1,200 demo hammer. The crew thought the motor was gone. Forty minutes and $35 later, it was beating concrete like it was new.
When to Call for Backup
Sometimes you need to know when to fold 'em. If you see:
Deep grooves in the commutator
Cracked motor housing
Evidence of burned windings
Any situation where you're in over your head
Take it to a pro. I've had customers bring in tools they made worse by trying to fix without the right knowledge.
Making Your Brushes Last
Simple maintenance goes a long way:
Keep your tools clean - blow them out regularly
Don't block cooling vents
Avoid pushing tools beyond their limits
Store them in dry conditions
Check brush length on your most-used tools every few months
The bottom line? Don't toss that "dead" tool until you've checked the brushes. It's saved my customers thousands over the years, and it's one of the most satisfying repairs you can do. Nothing beats the feeling of bringing a trusted tool back from the dead.
What's your brush replacement story? Ever brought a tool back from the grave? Drop it in the comments below - let's see who's got the best save.


